Creation #2: Glider
- curiocitylabs
- Jun 11, 2024
- 3 min read

Hello! We are very happy that you have joined us today to create a foam glider. This is an extremely fun project to create and fly around. Down below is a list of steps that you can use to create your plane, but feel free to add your own touches!
Materials
Box Cutter
Foam
Tape
Ruler
Pencil
Step #1
The separate parts of the glider are drawn out on a sheet of paper. Cut each part out with a pair of scissors. Once they are cut, lay each part out on a sheet of foam. Make sure there is a few centimeters of space between each component on the foam to make it easier to cut. Use 2 to 3 pieces of tape to hold the paper components to the foam.

Step 2:
Carefully cut out each component from the foam using a box cutter or a simple knife. Be careful with this tool and do it under adult supervision! There is no need to rush while cutting the components. Take your time! Pro Tip: Place your ruler along the straight lines of the component. This strategy will help you cut the straight edges easily. On the curved edges, such as for the body component, it is best to go slow to achieve the best cut.


Step 3:
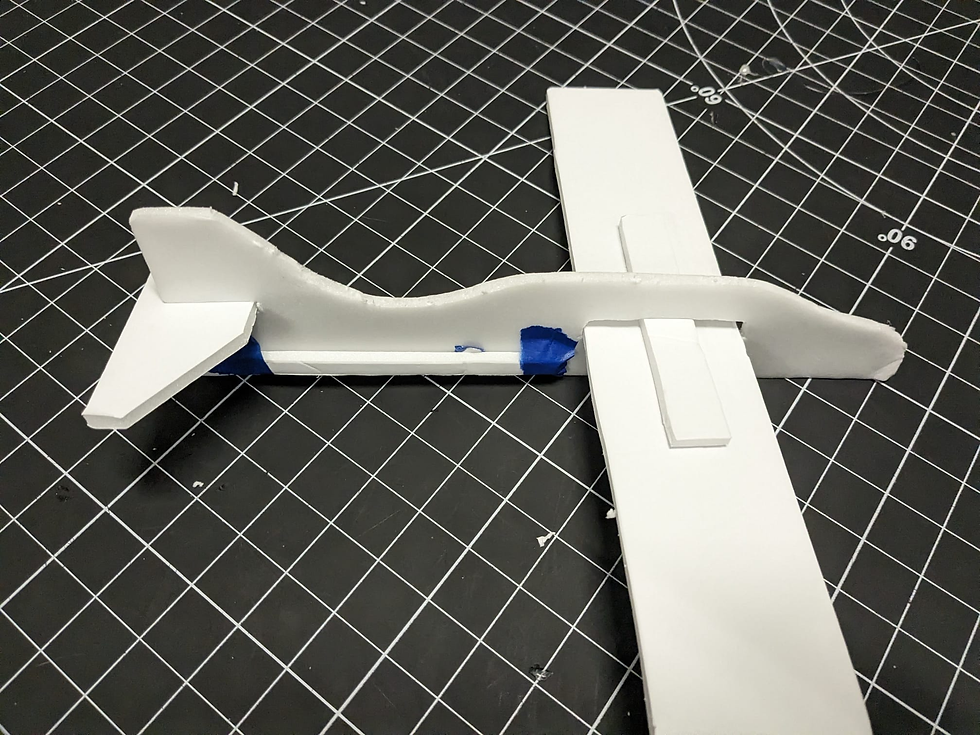
Once you have each component cut out, lay them out in front of you. You may take off the sheet of paper from the foam if you want to. In this step, we will be cutting out sections of the Body component to fit the Tail and Wing Sections. We will be creating slits. Firstly, we will be creating the Tail slit. On the right part of the Body component, there should be a slit outlined with a pencil. The slit is shown in the picture below. Carefully cut out this slit using your cutter. Once cut, try to fit the Tail into this area. Push the Tail inside so that is symmetrical.

Now, we will do this same process but with the Wing slit. This wing slit is in the middle of the Body component. First, draw out a box in the shape of the cross-sectional area of the wing in the middle of the Body. Cut this box out with your cutter, and try to fit the wing in it. You may make adjustments to the slit to make the wing fit better. Make sure that the wing fits in snugly so that it does not come out during flight. We have put an additional piece of foam with the wing within the slit so that the wing stays snugly fit.

Step 4:
Congrats, the plane is constructed! Now we have to deal with this thing called the 'Center of Gravity'. To have a balanced flight, the plane must be balanced. It can't be nose or tail-heavy. To balance the plane, we must first find out what part of the plane is heavy. Place the plane on two fingers underneath the wing. Let the plane lean forward or backward. If the plane leans forward, it is nose-heavy. If the plane leans backward, it is tail heavy. In our case, the plane was tail-heavy. To balance out the plane, we needed to add weight to the nose. We did this by taping a penny to the front of the plane. After a few tests, we found the perfect location for the penny for the plane to have a balanced flight. This step requires a few test flights to determine the locations of the counterweights. This step was the most fun in our opinion because it required a lot of scientific thinking and trial & error. We hope you have fun with it!
Once you have completed all of the above steps, your plane should fly like this:


Comments